Saturday, November 27, 2010

It’s a Party!

I know I’ve been teasing you for over a week now, as to what that mega project I was involved in actually turned out to be.  Welllllll, without further ado … they are birthday invites for my grand daughters 1st birthday! 

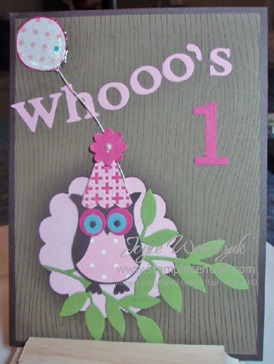
My grand daughter has a security blanket which is a combination blanket and stuffed owl – she carries it with her everywhere.  Actually, she has several of these just in case one is forgotten somewhere, misplaced, in the wash, whatever – we do not want our little darling to be in distress!  Since Cam is so enamored with Owlie, her mom really wanted to do an owl theme for her birthday.  I didn’t have to be asked twice to be in charge of the invites, I was truly excited to have the opportunity to play with my new 2-step Owl punch.  Those that know me well, know I don’t think in “simple” mode.  I also tend to be somewhat of a perfectionist, am not happy leaving well enough alone. <sigh>  So what should have been a quick and easy 26 invitations, turned out to be quite an ordeal – but here is the finished product:

BDAY INVITE FRONT

This started out as bits and pieces of several other cards I had viewed online, then off in my own direction I went.  The silliness kicked in when trying to figure out what wording we wanted on the front … I think my idea is rather self explanatory.  <grin>  I couldn’t find any current designer papers in Pretty In Pink that looked right on this card.  My neighbor let me dig through her stash of retired papers and I found a few pieces that were perfect!  I love the polka dot balloon, which is covered with crystal effects for more dimension; pink crochet thread added for the balloon string.  The party hat is a small pennant shape cut from a scalloped square punched piece.  Prior to punching and cutting, I lightly brayered Melon Mambo ink on the Square Lattice embossing folder and ran it through the Big Shot – LOVE how the design turned out!

PB240009b

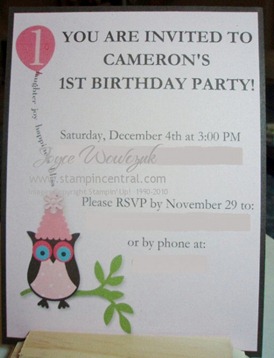
The invitation is a postcard style, this is the back.  I designed it using the Stampin’ Up! My Digital Studio software.  I honestly could not believe how quickly this portion came together. 

After completing the graphics and text boxes, I selected all elements and copied/pasted this design three more times so I ended up with a total of four invitation sections per page.  I then printed it on Pink Pirouette card stock and trimmed each quarter page to fit the back of the invite.  No embellishments were added to this side.  Since all the details were typed in the MDS program, all my daughter-in-law had to do when I turned these over to her was to put them into a stamped envelope and drop into the mail.

For my public blog posting, I did edit out all the personal info … am pretty sure my son will not be thrilled with me if you all show up on his doorstep. <grin>


Wednesday, November 24, 2010

Unlimited Possibilities

Have you been searching for something just a little different than the norm for your cards?  You can make your very own embossed backgrounds in any design you wish with just a few die cut pieces, some cardstock and a crank of your Big Shot!  

I stumbled on this technique totally by accident quite a few months ago, then quickly forgot about it as I became busy with other demands.  Imagine my surprise when I started seeing many more unique creations using the same basic principle I thought I discovered!   hehehehe, just goes to show you that great minds really DO think alike! 

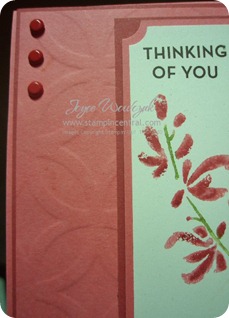
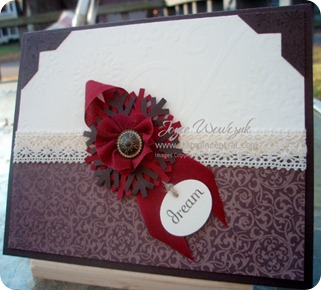
EMBOSSED LATTICEThis is a sample of my original “discovery” … I used the Lattice die and embossed it into the background panel.  I liked the end result so much that this became one of those cards I just couldn’t bare to part with, so tucked it away for safe keeping.  Evidently I created this card before the color renovation became official, so please forgive the use of retired product.  I felt it was a great example of this technique and photographed very well, so decided to include it in this post.

When I came across that card a few weeks ago, I decided it was a wonderful idea to teach to my club members.  This time I went with a more seasonal theme … snowflakes.

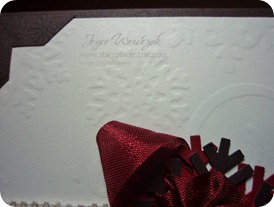
EMBOSSED SNOWFLAKES

I chose to use the new Northern Frost decorative strip from the Stampin’ Up! Holiday Mini, using several of the snowflakes and trimming some off at the edges of the cardstock.  I now have a new “texture plate” of my own that I can use over and over again!

And the finished product this design was used on?  Since one of their projects for the evening was a holiday themed item, I wanted to go with something just a little different.  I felt this design could be easily used as a non-traditional holiday card, with a bit of a vintage feel … or simply as a winter themed greeting card.

PB150007a

PROJECT RECIPE:

Stamps:  Fabulous Phrases, Serene Snowflakes
Paper:  Early Espresso, Very Vanilla, Cherry Cobbler, Deck the Halls dsp
Ink:  Early Espresso
Accessories:  Northern Frost decorative strip, Swirly decorative strip, Crochet Ribbon, Cherry Cobbler seam binding, snowflake punch, 3/4” oval punch, photo corner punch, antique brad, linen thread


Friday, November 12, 2010

Mass Production

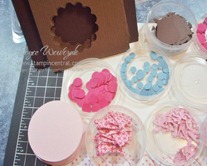
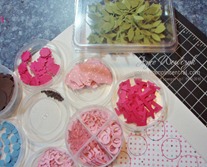
I’ve been busy, busy, busy the past few days – working on a very important project for a very special person in my life.  My stampin’ quarters are in total disarray at the moment as I’ve spent the past 3 days (I am not exaggerating) doing nothing but cutting out all the little pieces for this project.  My Big Shot got a huge workout, as well as a few favorite punches.  I’m tellin’ ya – my arms are screaming at me right now!!!

Here are a few snapshots of my over-organizational skills …

PB120002   PB120001

notice the little containers that are holding all those tiny pieces; they are the plastic containers that Stampin’ Up! puts their buttons and brads into.  I knew I needed to hang onto them for some reason!

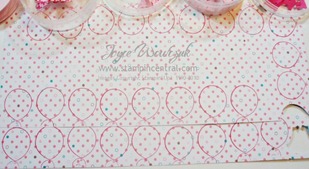
PB120003All I have left to do is cut out all these circular shapes, then the assembling fun will begin. 

Have you guessed yet what all these pieces of paper are going to be turned into?  Stay tuned … I’ll be posting the finished project in a few days!    


Monday, November 8, 2010

Winter Greenery

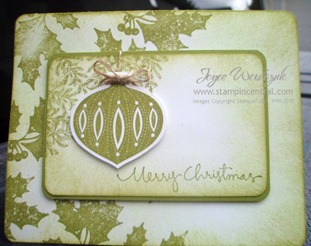
I’ve been wanting to make a Christmas card that was created using minimal supplies and mostly white cardstock – thinking most everyone has an abundance of white in their personal paper stash.  It all came together rather quickly – gotta love it when that happens!  Once finished, I thought that this card might be a conglomeration of several cards I’ve viewed recently … there have been so many I can’t seem to clear my head of all the wonderful ideas I’ve seen.  I  guess I shall call it a loose case of too-many-to-name talented artists.

PA020004

I did a lot of sponging on this card, covering the majority of the card stock with two complimentary shades of green. Then cut the brightness by dabbing a bit of very light brown ink on top of those greens.

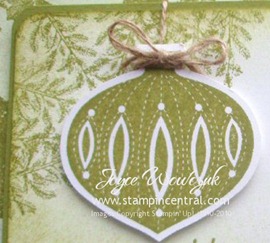
PA020004 (2)See those little branches on the center panel? Look very closely … did you notice they are from the Lovely As A Tree stamp set?  I inked only the tips of the single tree and stamped randomly around the corner of the cardstock.  How wonderful to find yet another use for this fantastic set!

PROJECT RECIPE:

Stamps:  Peaceful Season, Lovely As A Tree, Christmas Greetings
Paper:  Whisper White, Old Olive
Ink:  Certainly Celery, Old Olive, Crumb Cake
Accessories:  Ornament punch, sponges, linen thread, dimensionals


Saturday, November 6, 2010

The Winner Is ….

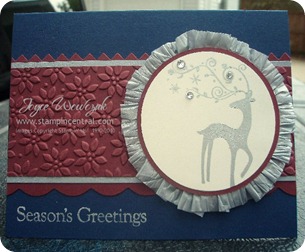
The past few weeks I’ve been working on and off to create some Holiday greeting cards.  I’m not so sure how I feel about this card, for some reason it screams “County Fair Ribbon Winner” to me … something about that waffle paper and circle combo.  It did get rave reviews from everyone else though, so I’ve decided I’m going to allow myself love it!

PA020007

Once again I found myself playing with my newest Stampin’ Up! toys (isn’t that what we’re supposed to do???).  I created this in one of my favorite holiday color combinations … Navy and Burgundy.  I know, it’s not exactly traditional – but I’m not really a traditional kind of gal.  While it appears there is a lot to this card, don’t let it fool you.  It surprisingly all comes together very quickly with a few cranks of the Big Shot handle

I have to tell you … the waffle paper is tons of fun to work with and really goes a long way.  I enjoyed it so much I just had to place another order so I could have even more colors to play with!

PROJECT RECIPE:

Stamps:  Dasher, Four the Holidays
Paper:  Night of Navy, Bravo Burgundy, Very Vanilla, Brushed Silver
Ink:  Platinum Shimmer Paint
Accessories:  2 1/2” circle punch, circle scissors, Tasteful Trim Bigz XL die, Petals a Plenty embossing folder, Metallic Silver Waffle paper, basic rhinestones, dimensionals


Monday, November 1, 2010

Decorative Candles part 2

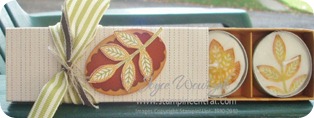
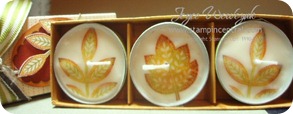
Here is the second project that was made at my candle stamping class last week.  Transforming these tealight candles into a decorative gift item was so quick and easy, I’m planning on creating more of these for holiday gifts!

PA310003a

PA250010b

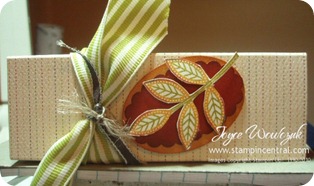
I sure wish I could take credit for this clever idea, but must admit to finding it in my wanderings.  Many thanks to Tanya Boser for generously sharing her talent and directions.  I modified the size of the gift box to hold 3 tealight candles and added a divided insert.  PA310004aThe images were initially stamped with one color, then markers were used to highlight various portions of the leaves to add some color and depth.  I suppose a disclaimer should be added when burning the tealights.  Since the image is stamped on tissue paper, it may burn – so never leave these unattended!  I did a trial run on one candle and it only singed a bit of the image, but you never know … it is paper and we all know paper and fire do not mix well!

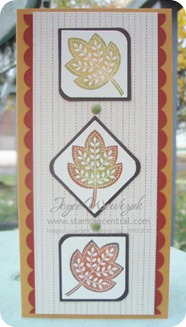
Of course, no gift is complete without a coordinating card.  I love this simple layout using Stampin’ Up!’s square punches, layered with a wide strip of matching designer paper and contrasting scallop edged borders. 

PA250010a


Project Recipe (all projects included)

Stamps:  Day of Gratitude
Paper:  More Mustard, Cajun Craze, Early Espresso, Very Vanilla, Autumn Spice DSP
Ink:  Old Olive, More Mustard, Cajun Craze, Early Espresso
Accessories:  Markers, square punches, corner punch, Scallop Edge border punch, brads, tissue paper, heat gun, scallop oval punch, wide oval punch, 1/8” grosgrain ribbon, 1 1/4” striped ribbon, linen thread, dimensionals


Related Posts Plugin for WordPress, Blogger...