Saturday, November 14, 2009

Forgotten Stash

I was working on reorganizing the closet in my stampin' quarters yesterday and came across a package of cork trivets I had purchased several months ago.  I'm sure you understand ... one of those things I saw that I thought "hey, I bet I can do something wonderful with that!", and it magically jumped into my shopping cart.  Once home, it was put into the closet where it was quickly buried forgotten (I prefer to believe it was hiding from me).  With the holidays quickly approaching I thought I would finally take some time to play and see what I could come up with ...  
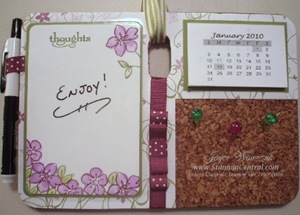
CORK MESSAGE CENTER - CLOSE UP

... a nifty message center!  On the left side is a dry erase marker board for those quick little notes I'm always needing to jot down, the right side is a mini calendar and bulletin board.  Lucky me, I just happened to have some push pins that color coordinated with the Stampin' Up! Cottage Wall designer series paper.  I cut the prongs off of a jumbo white grommet, attached it to some ribbon and used it as a hanger.  Below is a picture of it hanging proudly on display!
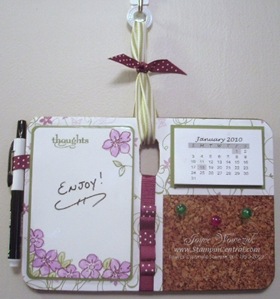
CORK MESSAGE CENTER


Recipe

Stamps: Flower Fancy, Grateful Greetings
Paper: Whisper White, Old Olive, Cottage Wall dsp
Ink: Old Olive, Orchid Opulence, Rich Razzleberry
Accessories: Old Olive 1 1/4" striped ribbon, Rich Razzleberry polka dot ribbon, jumbo grommet, corner rounder punch, sticky tape


Sunday, November 1, 2009

Slump-buster

Need a card and have no idea where to start?  In one of those creative slumps?  Take a peek in your Stampin' Up! Idea Book and Catalog, it's a wealth of wonderful inspiration at your fingertips!

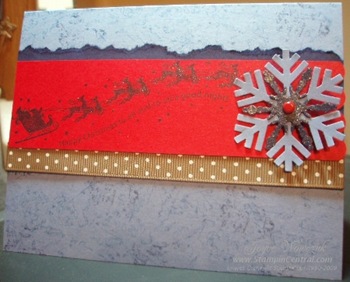
On this card I used a layout from page 27 in the IBC, chose some of my fun new holiday toys to play with.  Do you see the tiny bit of shimmer on the Santa and reindeer image (ok, so you have to really squint to see it - the photo doesn't do it justice) ... just ink up your stamp with classic ink, then use a dauber and lightly dab with the new shimmer paint - I used Champagne Mist.  It really gives the card a sparkly glow!  The smaller snowflake (Merry Details sizzlet) was cut from Night of Navy cardstock, then sponged with more shimmer paint ... oh how I love this stuff!  If you're wondering, the background is just wadded up wax paper, which I smooshed in the ink pad and "stamped" it randomly in Brocade Blue and Night of Navy (saran wrap works well too).  I really like the results of this technique.

Shimmering Snowflake 
Card Recipe:
Stamps: 
Wandering Words
Paper:  Brocade Blue, Night Of Navy, Real Red
Ink:  Brocade Blue, Night of Navy, Champagne Mist Shimmer Paint
Accessories:  Jumbo Snowflake Punch, Merry Details Sizzlit, Big Shot, Polka Dot Ribbon, brad, dimensional, sponge dauber, Scallop Edge punch


Related Posts Plugin for WordPress, Blogger...